Why Students Love Mystery Pictures (And Why Teachers Want Them)
If you have ever watched a class work through a standard math drill, you know how hard it can be to keep students focused on repetitive practice.
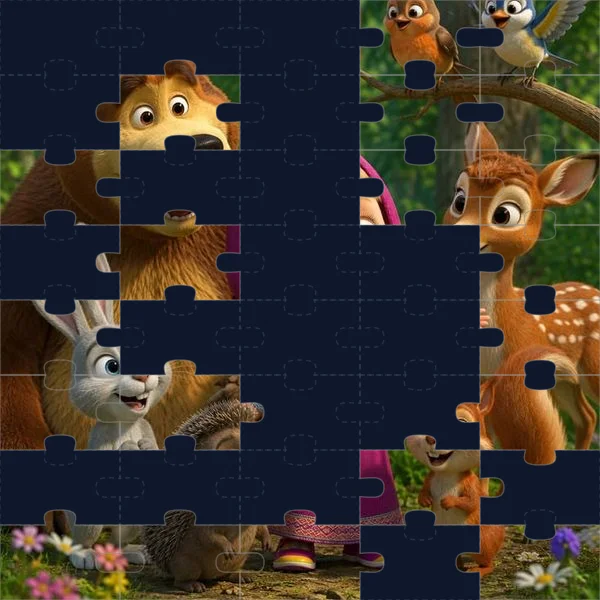
Mystery picture worksheets solve that engagement puzzle in a simple, visual way. Instead of working through a plain list of questions, each correct answer unlocks a cluster of colored tiles or puzzle pieces on a hidden grid. Students get immediate confirmation that their thinking is on track, and they are motivated to solve the next problem to see more of the picture appear.
For teachers, the biggest draw is self-checking. When a student enters an incorrect answer, nothing appears on the canvas. The student immediately knows to re-check their work without waiting for you to grade the assignment days later.
The catch? Building these mystery pictures completely from scratch in Google Sheets takes a surprising amount of time—often two hours or more for a single 15-question assignment. Let's look at how the traditional spreadsheet method actually works so you can see where that time goes.
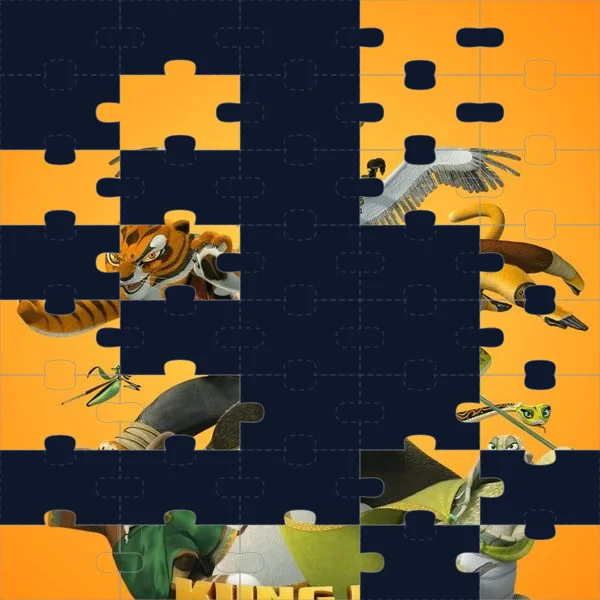
A 50% revealed mystery picture: each correct math answer reveals another cluster of puzzle pieces, keeping students motivated to solve every problem.
How the Classic "Number-Coded Grid" Method Works
When teachers look for DIY templates online, they almost always run into the classic number-coded grid approach. It is a clever technique that uses Google Sheets' built-in Conditional Formatting feature. Here is the basic structure:
- Setting Up the Canvas: You select a block of columns (for example, columns D through AJ) and resize them to 20 pixels wide, then resize rows 1 through 99 to 20 pixels high. This turns the spreadsheet into a large grid of square cells.
- Drawing with Numbers: Instead of using the paint bucket to color the cells directly, you type numbers into the grid to represent colors. For instance, you might type the number 3 in every cell that should eventually turn red, the number 1 in cells that should turn blue, and the number 15 in cells that should turn beige.
- Writing the Dual-Condition Formula: Next, you tell Google Sheets to color a cell only when two separate things happen: the student entered the correct answer in the answer box, and the cell contains that specific color code.
To do this, you highlight the entire grid canvas, open Format → Conditional formatting, choose Custom formula is, and enter a formula like this:
=AND($B$2=3, D1=3)
Here, cell B2 holds the student's answer to Question 1, and the number 3 represents both the correct answer and the number coded into those red cells. You set both the background fill and the text color to red so the underlying numbers stay invisible. When the student types 3 in cell B2, every cell in the grid with a 3 instantly turns solid red.
The `=AND()` formula requires both conditions to be true simultaneously. If cell B2 contains any other number (or is left blank), Google Sheets ignores the rule and the cells remain plain white.
Skip the 2-Hour Formula Setup in Your Next Math Class
Create a self-checking Google Sheet with 140+ Common Core math skills and instant mystery reveals in under 30 seconds.
The 5 Hidden Traps of Building Sheets by Hand
The number-coded method is technically clever, but once you start using it in a busy classroom week after week, several practical frustrations quickly pop up:
- 1. Math questions are dictated by the drawing, not your curriculum: In this manual approach, you have to draw the picture first and assign numbers to each color. Then you have to write math problems whose solutions match those specific numbers. If red is coded as 3, your math problem must equal 3 (like 5 - 2). You end up designing your lesson around the numbers in your drawing rather than what your students actually need to practice.
- 2. Changing an answer triggers a domino effect: What happens if you want to change problem #1 to a decimal, such as 3.5? You cannot simply change the question. You have to open the conditional formatting rule, update the formula to 3.5, and then hunt through dozens of cells on your grid to replace every single 3 with 3.5. If you miss even two or three cells, parts of your picture will stay permanently blank.
- 3. Adding new colors takes extra steps: If your artwork needs an 11th or 12th color (say, purple with an answer of 77), you have to duplicate an existing rule, change the cell reference from B11 to B12, set the target value to 77, pick your colors, and manually type 77 into the grid cells.
- 4. Students can easily peek at the answer key: Because the rules live directly inside Google Sheets' conditional formatting menu, any student who clicks Format → Conditional formatting can see every single answer in plain text.
- 5. Differentiating for multiple levels multiplies your prep time: If you have students who need single-digit practice and others ready for two-digit multiplication, you have to repeat this entire manual process for each version. Creating three differentiated sheets can easily eat up four to five hours of your weekend.
Tech-savvy students quickly discover that conditional formatting rules are visible to anyone with edit access. Once one student finds the answer key in the menu, the secret spreads across the classroom.
Manual Spreadsheet Templates vs. Automated Studio
Here is a straightforward look at how the manual formula method compares to generating worksheets with PixelArtMath:
| Feature | Manual Formula Method | PixelArtMath Studio |
|---|---|---|
| Setup Time | 60 to 120 minutes per sheet | Under 30 seconds |
| Formulas Needed | 30 to 80 manual =AND() rules | Zero formulas to write or manage |
| Math Curriculum Alignment | Hand-typed; constrained by drawing codes | 140+ Common Core K–8 skills ready to select |
| Changing Questions | Requires editing rules and grid cells | 1-click refresh or instant custom question swap |
| Cheat Protection | None (rules visible in formatting menu) | Built-in formula protection and hidden answer logic |
| Visual Variety | Flat single-color pixel blocks only | 11 reveal styles (Jigsaw, Frosted Glass, Stained Glass, Pixel) |
| Student Feedback | Tiles appear or stay blank | Clear "⭐ Correct!" and "❌ Try again" labels |
A Simpler Way: Generating Mystery Pictures in 30 Seconds
You do not have to spend your evenings managing spreadsheet coordinates to give your students the benefit of self-checking mystery pictures.
With the PixelArtMath Chrome Extension or web studio, the entire creation workflow takes three straightforward steps:
1. Choose Your Grade and Math Skill Browse through 140+ standards-aligned topics ranging from kindergarten counting and single-digit facts up to middle school fractions, integers, and two-step equations.
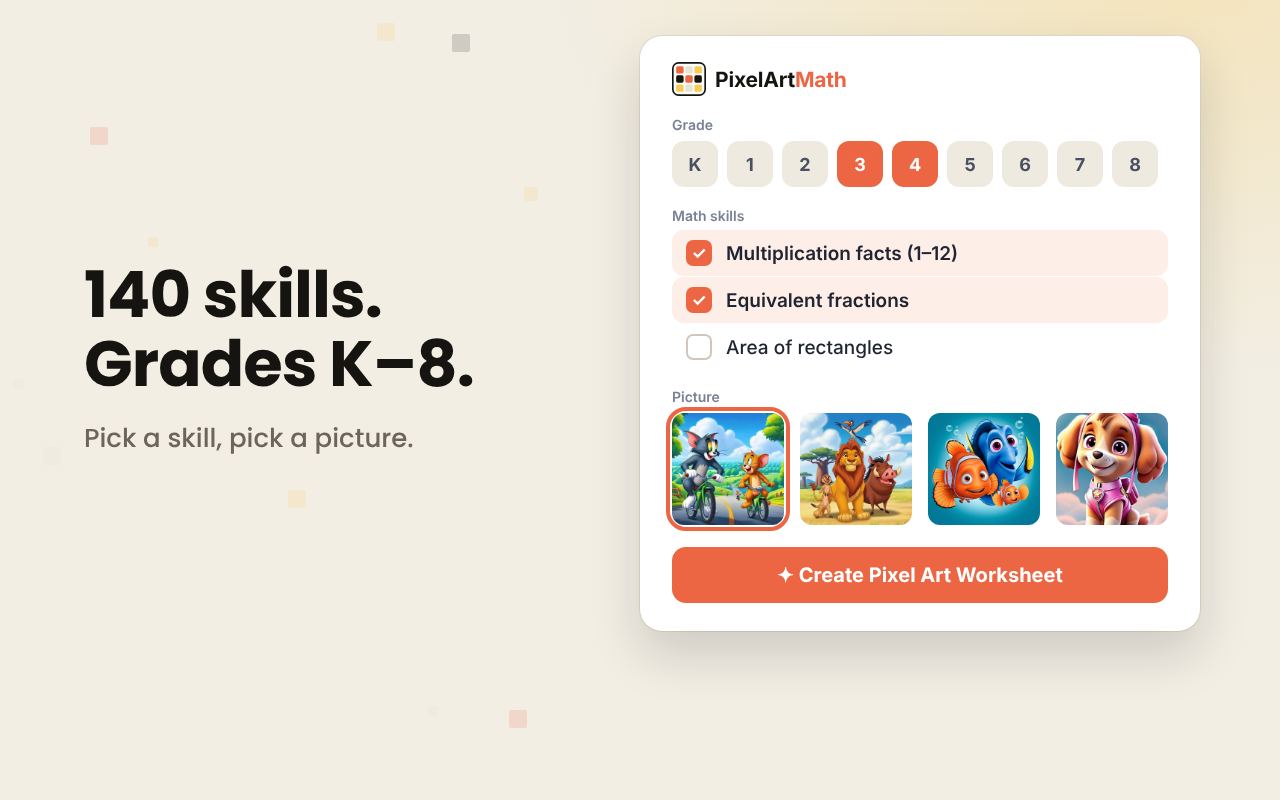
Browse 140+ standards-aligned Common Core math skills across Grades K through 8
2. Select an Artwork and Reveal Style Pick from a wide library of engaging themes (like Kung Fu Panda, Spiderman, or underwater scenes) and choose how the image uncovers—whether as classic retro pixels, interlocking jigsaw puzzle pieces, or frosted glass tiles.
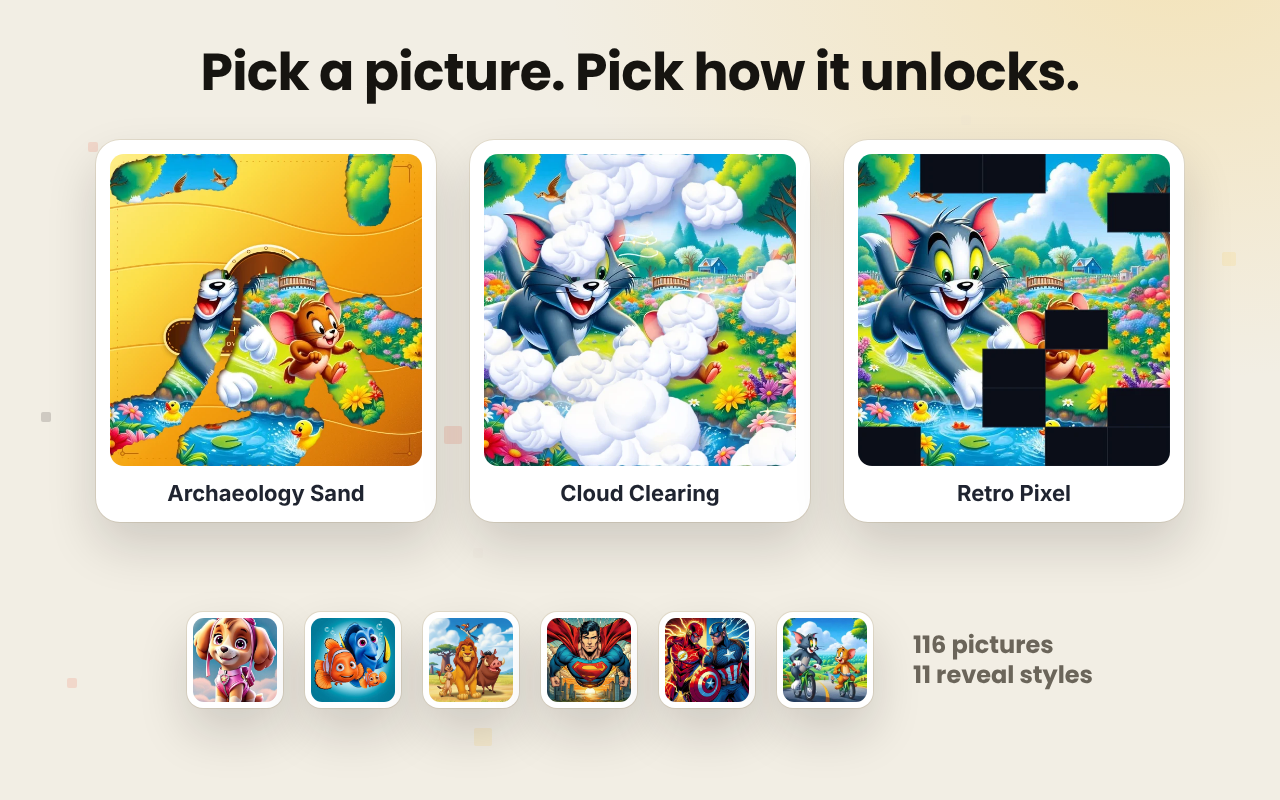
Choose from student-approved themes and 11 unique reveal styles (including Jigsaw, Frosted Glass, and Pixel)
3. Click "Generate Worksheet" A complete, formatted Google Sheet is created directly in your Google Drive in seconds. The problems are laid out, the self-checking status formulas are set, and the picture reveal is fully configured and ready for students.
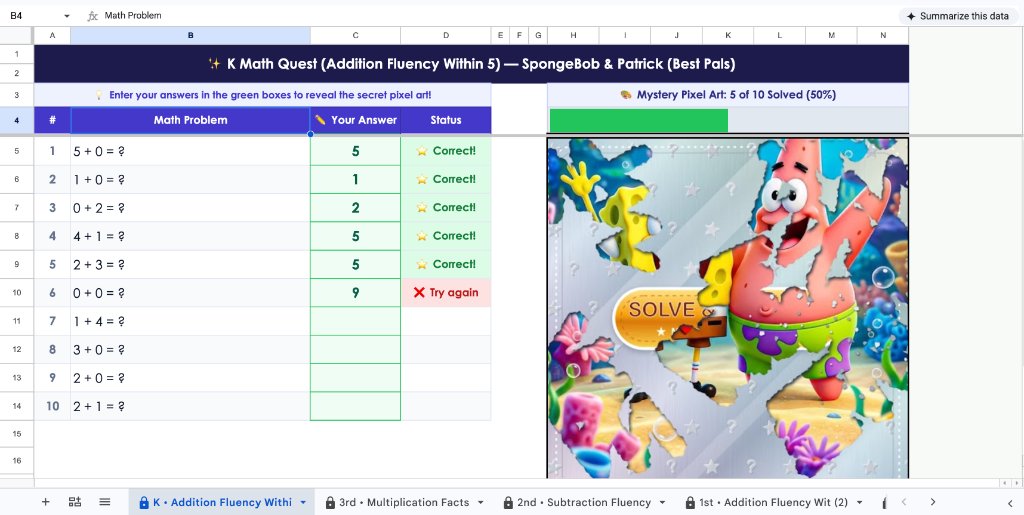
Complete self-checking Google Sheet with live '⭐ Correct!' feedback and mystery picture reveal
Students get immediate positive feedback on every question, the answer keys remain tamper-resistant, and you get your prep time back.
3 Practical Ways to Use Self-Checking Sheets in Class
Once you have your sheets ready, here are three simple ways teachers use them during the school week:
- Independent Math Stations: While you pull a small group for targeted intervention, other students can work independently on mystery picture sheets. Because the sheet tells them immediately if an answer is correct, they do not get stuck waiting with their hands raised.
- Warm-Ups and Bell Ringers: A 5-to-10 question mystery picture makes an effective, calm start to a math block. Students settle into their seats quickly because they want to uncover the image.
- Google Classroom "Make a Copy" Assignments: When creating the assignment in Google Classroom, simply choose "Make a copy for each student". Each child gets their own interactive sheet, and you can easily check completed work at a glance by looking for fully revealed pictures in your Drive.
Because mystery sheets are visual, you can walk around the classroom and gauge student progress from across the room just by looking at how much of each student’s artwork is uncovered.
Ready to create self-checking mystery math sheets in 30 seconds?
Try the free PixelArtMath Chrome Extension and generate your first interactive Google Sheet today.
Install Free Chrome Extension →